Understanding resumes
A resume is like a marketing flyer, presenting you as the product. It’s your sales pitch to show recruiters and hiring managers why they should interview you. Its entire purpose is to convince them just enough to invite you to an interview.
How recruiters review your resume
Recruiters spend just 6 to 11 seconds on a resume before deciding if it’s worth a closer look, so clarity and focus are crucial. Your resume undergoes three stages of review.
Scan (6 – 11 seconds):
During this stage, recruiters typically scan resumes in an F-pattern, focusing on the top, left, and occasionally the bottom of the first page. They instinctively search for keywords like skills, job titles, and company names in addition to your name and location.
If nothing relevant stands out quickly, your resume is set aside. To pass this initial test, it’s essential to demonstrate your resume’s relevance within the first 3 seconds.
The best way to grab their attention is to include a Hero Message or headline in bold just below your name that tells your target role and key skills aligned with the job posting.
Keep in mind that 75% of resumes are rejected at this stage, so writing a strong hook is crucial to making it through to the next round. We’ll cover your Hero Message in a later chapter.
First review (60 – 120 seconds):
Once the resume passes the 6-second test, recruiters will take a deeper look. This is when they read the bullet points in your work experience section.
Numbers here will stand out because they’re screaming for attention among dense text. But it’s a fine line: too many numbers can lose their charms and credibility.
Keep in mind that many recruiters are not subject matter experts. Also, they’re not looking for a perfect match. If your resume can convince them you are 60% of a match, you’ll be rolled to the final round, when the recruiter sends your resume to the hiring manager for review.
Second Review (60 – 120 seconds):
This review is done by the hiring manager or a delegate from the team. These are the subject matter experts. Only 5–10% of resumes make it to this stage.
Many hiring managers prioritize the candidate’s work experience. They tend to prefer ready-made candidates—those with direct experience required for the role—over ones with indirect experience or potential.
For example, imagine a position where the primary responsibility is search engine optimization (SEO). One candidate’s resume highlights an excellent track record in digital marketing with some SEO experience, while another candidate’s resume focuses extensively on SEO with a bit of digital marketing experience. In most cases, the second candidate is likely to be chosen for an interview because the resume directly aligns with the job’s core requirements.
This is why your resume should not resemble a career biography. Instead of writing your professional history like it’s a Wikipedia article, you must strategically showcase the experiences and skills most relevant to your target jobs. Including unnecessary details can overwhelm reviewers and obscure your key qualifications.
Writing your resume
Now, Job Seeker, your training is almost complete. But you are not a Job Quest Hero yet. Are you ready to dust off your trusty keyboard and begin writing?
The recommended length of a resume is 1 to 2 pages, with 400 to 800 words. It takes deliberate effort in highlighting your relevant skills and achievements clearly and concisely. Such resumes follow the norm, allowing recruiters to easily scan key details, and are built around five key sections and two optional sections:
- Contact Information
- Hero Message
- Professional Summary (Optional)
- Skills
- Work Experience
- Projects (Optional)
- Education
Let’s explore how to nail each of these sections.
Contact information
Keep this section straightforward. Include your full name, city/state, phone number, professional email address, and LinkedIn URL. Try to compress information to fit into a single line, apart from the name.
Name: You can use a preferred name instead of your legal name, especially if your full name is long or difficult to pronounce. Ensure that the name on your resume matches the one on your LinkedIn profile. Consistency helps recruiters avoid confusion.
City/State: Include only your city and state—never your full address or zip code. Listing your full address can pose security risks and lead to distance bias, where a perceived long commute might disadvantage you. If you live in a small town, use the nearest major city to improve visibility in recruiter searches. For instance, replace “Naperville, IL” with “Chicago, IL” or “Chicago Metro Area, IL.” If you plan to relocate, clearly indicate this in your location header, such as “San Jose, CA (Relocating to Austin, TX).”
Phone number: Provide your cell phone number, as it ensures you are reachable when needed.
Email address: Your email address should appear professional. Avoid using outdated providers like Hotmail or AOL, as these can create an impression of being out of touch and may even trigger age bias. Gmail is the safest and most widely accepted option. For brevity, limit your email address to fewer than 18 characters, excluding the domain name.
LinkedIn link: It’s highly recommended to include a LinkedIn link, but only if your LinkedIn profile is up to date and showcases compelling details about your professional experience. If your profile is incomplete or weak, it’s better to leave it out. Additionally, update your LinkedIn profile URL to make it clean and easy to share. For example, instead of a LinkedIn handle like “arthur-dent-90ab92126cef3,” you can customize it to something simpler, like “arthur-dent-123”. Write the link as “linkedin.com/in/arthur-dent-123” as opposed to “https://www.linkedin.com/in/arthur-dent-123”. The brevity can allow contact information to be on a single line.
Hero Message
A Hero Message is your professional identity that appears right below your name on the resume. It is a very brief, compelling statement designed to grab the recruiter’s attention quickly from the start.
Think of your Hero Message like a headline in a newspaper. Its goal is to hook the reader to know more about you. This message should distil your most marketable, specialized skills into a format that is instantly recognizable and highly relevant to the jobs you are targeting. It frames your resume and sets the tone for the rest of the document, presenting you as an obvious candidate from the outset.
Here are some examples for different industries:
Full Stack Developer | MongoDB & React | Cloud Solutions Expert
SEO Specialist | Content Marketing | Digital Advertising
Certified Public Accountant | Risk Management | Compliance Oversight
Registered Nurse | Emergency Response | Healthcare Compliance
Alternatively, you can use a brief statement like:
Digital Marketing Professional with 3 Years Of SEO Experience
Pro tip: JobQuest Super Editor supports the Hero Message and can generate one based on your resume and job description.
Skills
The Skills section is a dedicated part of your resume that helps recruiters assess your qualifications at a glance. It’s typically a concise list of hard skills (technical or job-specific skills) and occasionally soft skills that align with the job description.
Aim for 6-12 skills that are highly relevant to the job you’re targeting. This keeps the list focused and ensures you’re highlighting the qualifications that matter most.
Prioritize hard skills over soft skills unless the role specifically demands the latter. Hard skills, like software expertise or technical tools, are easy for recruiters to identify and evaluate. Also, list only the skills you’re confident in using.
Avoid the temptation to rate your skills. Think about it. Why list a skill if you’d only rate it to 2.5 stars? It can undermine your expertise.
Steer clear of generic or common skills like “Communication skills”. Focus on rare or specific skills that set you apart. For example, list “Public speaking” or “Objection handling” instead of “communication skills.”
Two popular formats are used to list skills. Use a simple list when you want to keep your resume minimalistic or focus on a few, highly relevant skills. Choose grouped skills with bullet points when you have multiple technical or domain-specific ones to showcase.
Example of a simple list for sales representative
CRM, Salesforce, HubSpot | Objection handling, Negotiation | Public speaking
Example of a grouped list for a full stack software engineer
Frontend: React, Angular, Vue.js, TypeScript, Tailwind CSS
Backend: Node.js, Express, NestJS, Django, Spring Boot
Databases: PostgreSQL, MongoDB, Redis
APIs: REST, GraphQL, JWT
Professional summary (Optional)
The professional summary can be a valuable addition if you have 3+ years of experience, serving as a concise introduction to your expertise and accomplishments. The section should be kept under 85 words or 3-5 sentences. Write it in clipped style. Omit subjects such as pronouns.
Start with the target job title: Begin with the target job title or career focus, followed by your years of experience, to provide immediate context. Skip adjectives and focus on establishing credibility. For example, “Marketing specialist with 5+ years of experience in digital campaigns.”
Mention Key Skills: Identify two to three core skills from the job description and weave them into the summary. Use these skills to demonstrate your ability to add value. For example, “Skilled in driving multi-channel strategies that increase customer engagement.”
Add a key achievement: Include a specific, impactful result from your past roles that aligns with the job. Quantify your impact if possible. “Increased lead conversions by 20% through a data-driven content strategy.”
Close with a Value Statement: Wrap up with a statement that hints at your professional goals or ongoing value to the company. “Passionate about building customer-first solutions to drive business growth.”
Here’s an example.
Digital marketing specialist with 7 years of experience in SEO, PPC, and analytics. Spearheaded a campaign that increased website traffic by 40%, driving $500K in revenue growth. Adept at leveraging data insights to optimize performance and achieve measurable results.
Pro tip: Avoid using adjectives such as detail-oriented, data-driven, strategic, dynamic, etc. They are filler words that don’t add values. Instead, show what make you detailed-oriented or data-driven.
Work experience
The Work Experience section is where all your preparation comes to life. It’s often the first place recruiters review after your resume passes the initial 6-second skimming test, making it critical to get this section right. By backing up your Hero Message and the claims made in your Professional Summary with real-world examples of accomplishments and impact, this section demonstrates your qualifications and relevance to the role.
Arguably, it’s also the most challenging part to write. Striking the right balance between showcasing achievements and maintaining brevity can be tricky. This is why preparation is so important. Reflecting on your standout skills, achievements, and experiences, analyzing job postings for key requirements, and refining your write-up ensures that your Work Experience section aligns with employer’s expectations.
With thoughtful preparation and write-up, this section can transform from a dull list of past roles into a compelling narrative or story that connects your qualifications with the employer’s needs, grabs attention, and lands you an interview.
Order of work experience
The work experience section is a structured summary of your professional history. It is (and should be) arranged in reverse chronological order, starting with your most recent or current position and working backward. This format helps recruiters quickly understand your career progression and relevance to the role you’re applying for.
Do not deviate from this rule to highlight a prestigious or “rock star” company from your past. Rearranging the order can come across as misleading and may raise concerns about your transparency. Stick to reverse chronological order to maintain professionalism and build trust with reviewers.
Company name first or job title first
Deciding whether to list the company name or job title first in your work experience depends on your situation. If you’ve held multiple positions at the same company, list the company name first. This approach groups all your roles under one organization, making it clear that your career progression occurred within the same company. It also avoids the clutter of listing the same company repeatedly, which can confuse recruiters.
For roles at different organizations, either approach works. However, it’s important to maintain one consistent style throughout your resume. Choose one format and stick to it.
Work experience components
Work experience comprises the company name, location, job title, work period, and description.
Company name:Include the full name of the organization, avoiding abbreviations unless they are widely recognized. Avoid adding a stock ticker to the company name, as it is unnecessary and can clutter the presentation. If the company is not well-known, you can optionally include a one-line description before listing your achievements. For example, you might write, “Solaris is a startup company specializing in solar panels”. These details help ensure your experience is presented clearly and provides recruiters with essential context about your professional background.
Location:Providing the company’s location, such as the city and state (or country for international roles), is optional but can offer helpful context for recruiters.
Job title:Job titles are one of the first items recruiters skim through during initial screening. Be specific with your job titles to ensure they clearly convey the scope of your role. Generic titles like “Marketing Manager,” “Product Manager,” or “Supervisor” can make it harder for recruiters to understand what you actually did. Instead, add context to make your roles more apparent. For example: write “Marketing Manager | Social media,” “Product Manager | Network security,” or “Supervisor | Accounting.” You don’t have to use your official job title exactly as it appears in company records. As long as it accurately reflects your responsibilities and doesn’t inflate your seniority, you can tweak it for clarity and relevance. This approach makes it easier for recruiters to quickly understand your qualifications and how relevant they are to the role you’re applying for.
Work period: Including the month and year for each job period is the standard practice. It provides a clear timeline for recruiters to evaluate your career progression. If you have more than a decade of experience, you can simplify this by listing only the years to avoid drawing attention to minor gaps. If your career spans more than 15 years, it’s not necessary to include every role. Focus on the last 15 years of experience, as this is typically the most relevant for recruiters. Older roles can be summarized in a brief section, such as “Additional Experience,” without specific dates. Or you can entirely skip them.
Description: Write your narratives using bullet points that illustrate achievements. Use the PAR (Problem-Action-Result) or AR (Action-Result) method to structure each bullet point and include metrics or numbers sparingly. Start every bullet point with an action verb. For current roles, use either present or past tense. For past roles, always use past tense. Optionally, you can start with a brief overview of your role, responsibilities, or contributions to set the stage for your accomplishments. Aim for 3 to 6 bullet points per role, prioritizing recent experiences with more detail than older ones. Bullet points should typically be 8 to 25 words long. If bullet points become longer, reduce their total number to maintain clarity and brevity.
Here’s an example.
Digital Marketing Manager June 2020 – Present JobQuest | Santa Clara, CA
Oversaw the strategic planning and execution of marketing initiatives to drive revenue growth and improve operational efficiency.
Developed and implemented a marketing strategy that increased lead generation by 25%, resulting in $1M in additional revenue.
Managed a $20,000 advertising budget, optimizing campaign performance through A/B testing, retargeting and cohort analysis.
Streamlined GTM workflows, reducing new service launch times by 2 weeks.
Projects (Optional)
The Projects section of your resume is to highlight your accomplishments in a specific context. Consider adding a Projects section if:
- You have three years or less of work experience or
- Your work is heavily project-based or involves working with clients.
For seasoned professionals, it might be unnecessary unless the projects are particularly relevant to the job you’re targeting. Instead, include the achievements from projects in the Work Experience section.
If you’re a freelancer, your strategy should be different:
- Consolidate your freelance work under one comprehensive role in the Work Experience section.
- Use the Projects section to detail some of key individual assignments.
Resist the temptation to list every single project or client work you’ve ever worked on. Instead, focus on projects that support achievements in your Work Experience section or projects directly relevant to the target positions.
Each project entry should include the project name, organization, duration, and description.
Project name: Choose a clear, descriptive title that reflects the project’s purpose or outcome.
Organization (Optional): Mention the organization, school, or client for which the project was. developed.
Duration (Optional):Provide start and end dates (month and year). You can list only the end month or end year.
Description: Describe what the project is about if the project name is obscure. Write your detailed contributions and achievements, using 1 or 2 bullet points.
Here’s an example.
FastAI – Simplified deep learning framework Jan 2024 – Present
Open source community
An open-source library on PyTorch for training and deploying machine learning models
Implemented a new deep learning model architecture within the FastAI Vision Library using Python and PyTorch, achieving 94% accuracy on image classification benchmarks.
When presenting your projects, you have two options: reverse chronological order (starting with the most recent) or by the significance of their impacts. If you choose the latter, skip the duration entirely.
Education
Your education section is a crucial part of your resume. Here’s a quick guide to filling it out effectively, based on your experience level and unique circumstances:
Include only what’s relevant: Start with your degree, major, and school name. Keep it clean and straightforward. If your degree is from a foreign institution, add the country name to ensure clarity.
GPA: Only include your GPA if it’s a standout (3.5 or above) and you’re a recent graduate (or have less than five years of experience).
Graduation years: Be strategic. You can leave out your graduation year if you have over 10 years of experience. For those with 15 or more years of experience, it’s recommended to skip it to avoid potential age bias. While many recruiters may not pay attention to it, seeing that you graduated 25 years ago could unintentionally influence their judgment. If you had gap years during your education, it’s best to keep it simple by listing only the graduation year. If you’re still in school, make sure to include your expected graduation year.
Relevant coursework: Including 3 to 5 relevant coursework is beneficial for recent graduates with little to no work experience. List courses related to the job you’re applying for and avoid generic or unrelated classes. Place it in a separate section called “Relevant Coursework” instead of under “Education” as a distinct qualification, making it easier for recruiters to see. This approach avoids overcrowding the education section and gives your resume better structure and clarity.
Here’s an example.
Bachelor of Science, Computer Science 2024
San Jose State University
GPA 3.7 / 4.0
Tailoring a resume for different jobs
Customizing your resume for each job application can significantly increase your chances of landing interviews. Believe it or not, recruiters love tailored resumes.
However, it can be too time consuming to tailor resumes for each application. That said, you don’t have to do it for every single role. Instead, prepare 2 to 3 tailored resumes based on the types of jobs you’re targeting. Here’s how you can do it, step by step.
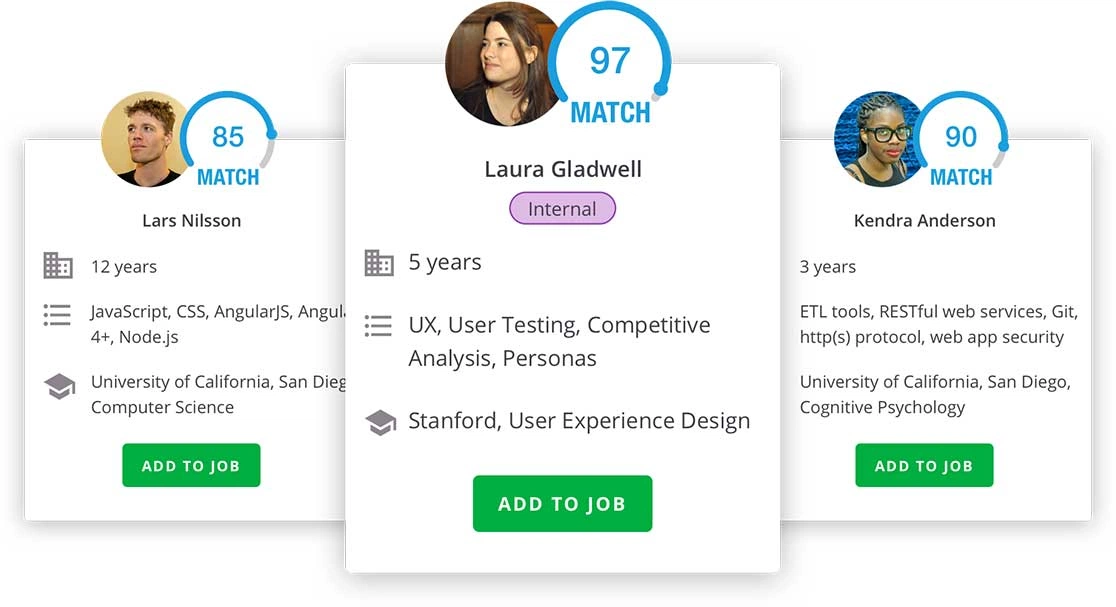
Pro tip: Check your JobQuest Job Match Score. Job Match Score is a measure of how well your resume matches the job description. If it is below 75, consider customizing your resume.
Discover keywords from job description
Carefully review the job description and identify keywords that stand out, such as required skills, job titles, and specific responsibilities. These keywords are what recruiters and applicant tracking systems (ATS) look for, so incorporating them thoughtfully into your resume is key. Many recruiters do not have domain knowledge but scan resumes for those keywords. If they cannot find out what they want in 6 seconds, your resume is out.
Pro tip: Leverage JobQuest’s Job X-Ray to discover keywords automatically.
Adjust or create your Hero Message (easy & most effective)
The Hero Message is the attention-grabbing statement at the top of your resume. Modify it to reflect the specific job title and key competency for the role. The Hero Message is the most important part of your resume to survive through a 3-second carnage of resume review. You can call it a click-bait. Here’s an example.
Original: “Experienced Marketing Professional”
Custom: “Digital Marketing Specialist | SEO & Paid Ads Expert”
Revise the Professional Summary (time-consuming but effective)
You can optionally tailor this section to emphasize the most relevant skills and achievements for the target role. For example, if the job focuses on project management, your Professional Summary should be about it. While this step can take time, it’s worth the effort for high-priority applications.
Customize the Skills Section (easy & effective)
Replace, add and reorder skills to match keywords found in the job posting. For instance, if the target job emphasizes “data visualization” and “Power BI,” include these terms along with a cluster of related skills such as dashboard creation, report automation, data storytelling, DAX (Data Analysis Expressions), and VBA scripting. Rephrase keywords to match the job description naturally while highlighting proficiency in tools like “Tableau”, “Power Query”, and “Python for data analysis”. This approach ensures your resume aligns broadly with the job’s requirements.
Update recent work experience & job title (time-consuming but effective)
Adjust the job title for your most recent role to align with the target job, as long as it accurately reflects your responsibilities. For example:
Original: “Software Developer”
Custom: “Software Developer | Front-End”
Edit work experience bullet points to make them relevant to the job description. For example, if React and Redux were mentioned as key qualifications in the job description, here’s what you can do.
Original:
Built interactive user interfaces for the company’s e-commerce platform, including product cards, navigation bars, and checkout forms.
Developed cart functionality, user authentication, and order history.
Built interactive user interfaces for the company’s e-commerce platform using React, creating reusable components such as product cards, navigation bars, and checkout forms.
Developed a global state management system using Redux for features such as cart functionality, user authentication, and order history, ensuring seamless data synchronization and efficient state updates across components.
Pro tip: JobQuest AI Customize enables you to tailor your resume with a single click. It generates a Hero Message, customizes your Professional Summary, and fine-tunes your most recent work experience. This feature is a time-saver and can offer insights into how to effectively optimize your resume.